CMake: Building SFML and Game Projects on Linux
A tutorial on how to build and install game projects using CMake and SFML

Introduction
The Simple and Fast Multimedia Library (SFML) is a cross-platform development library that provides simple APIs for creating games and multimedia applications. SFML can compile and run on Linux, Mac OS and Windows. The project is also working towards being able to compile Android and iOS applications out of the box. On top of this, SFML is written in C++ and provides an easy-to-use C++ interface. Several language bindings also exist for many popular programming languages.
SFML can facilitate the development of large-scale commercial game projects. It is also very accessible for smaller teams and hobbyists who are new to the realm of developing games and multimedia applications with C++.
Tutorial Overview
The first part of this article details how to install SFML on Linux using CMake. This process involves downloading the official SFML GitHub repository and using CMake to configure a build environment for generating artifacts such as the project’s shared libraries, header files and example projects. We then copy these artifacts to standard locations on the file system to complete an installation.
Once SFML is installed, we will switch our focus to developing applications that use its libraries. The traditional approach for developing SFML applications is to use an IDE that provides graphical tools to configure a project. Good examples of such IDEs are Codeblocks, Xcode and Visual Studio. This approach usually involves opening a dialog box to set search paths for libraries and header files, as well as specifying the actual library names an application will link to. The process of configuring a project will therefore be different depending on the IDE you use.
On the other hand, this article demonstrates how to configure SFML projects using CMake. Because the CMake program is a cross-platform build system generator, it is possible to configure how a project is built in a platform agnostic way. This means we can use an identical configuration script to compile an SFML project on Linux, Mac OS and Windows. With that said, we will focus on building SFML projects with CMake on Linux in this article to keep things simple.
More specifically, we will look at a minimal boilerplate project in addition to a pong game. Both projects link to SFML libraries and include a CMake configuration file for handling the build and install phases.

Source Files
A GitHub repository has been setup to accompany this tutorial. Run the following Git command to download it to your system:
$ git clone https://github.com/danebulat/cmake-sfml-demo.gitThe repository contains a couple of applications that are discussed in subsequent sections of this article. Feel free to check out the source code and try out the applications after you have SFML installed on your system.
1. Building and Installing SFML
This section details how to download, build and install the SFML project to your Linux system. It is worth pointing out that your distribution’s package manager probably provides an SFML package which will automatically install the SFML libraries for you. While convenient, this installation approach strips away your ability to customize an SFML build that matches your exact specifications. For example, a pre-configured package won’t allow you to do things like:
- Install SFML modules as only static libraries or only shared libraries.
- Select specific example projects to generate.
- Specify custom install locations for generated artifacts.
- Install a local copy of the documentation files.
With these points in mind, I recommend installing SFML with CMake whilst knowing that a pre-configured package is available if a system issue prevents you from completing the manual approach.
We will, however, use the package manager as an inspection tool to discover SFML’s dependencies. It is therefore a good idea to find out the name of the SFML package that your package manager points to. For example, pacman identifies the sfml package on Arch Linux:
$ pacman -Ss sfml
    -| community/sfml 2.5.1-2
           A simple, fast, cross-platform, and object-oriented
           multimedia API
Installing SFML Dependencies
The first step for getting SFML on a Linux system is to install a few libraries it depends on along with their development headers. The official SFML website provides a general list of project names whose libraries are required to install SFML. While it is not necessary to memorize each individual dependency, it is certainly useful to be aware of some back-end libraries SFML uses in its APIs:
The exact name of the package you will need to install for each dependency will vary depending on the package manager you are using. We can find out these package names by querying the SFML package that the package manager points to. On Arch Linux this is achieved by invoking pacman with the information flag:
# Use your package manager to identify SFML dependencies
$ pacman -Si sfml
    -| Depends On : libsndfile  libxrandr  openal  glew  freetype2
       libx11
You will also discover that SFML depends on an OpenGL back-end to perform graphics rendering if you read some of the online documentation. It is therefore a good idea to append the mesa package (an open-source implementation of the OpenGL specification) to your installation command to ensure this dependency is satisfied. So, on Arch Linux your installation command will look like this:
$ sudo pacman -S mesa libsndfile libxrandr openal glew freetype2
                 libx11
Lastly, the Doxygen program is required for building SFML documentation. Go ahead and install it if you plan on generating a copy of the SFML help files on your system:
$ sudo pacman -S doxygen graphvizAt this point you should have all of the dependencies installed. Keep in mind that CMake will detect any missing libraries when we build SFML in the next section, so don’t worry about being left in the dark if you are missing a particular dependency.
Downloading SFML
In order to build SFML we must first download its source code which is currently hosted on GitHub. Download the project to an appropriate place on your filesystem by running a Git clone command:
$ git clone https://github.com/SFML/SFML.git
$ du -hs SFML/
    -| 159M    SFML/
The du command reveals that the SFML repository will consume 159MB of storage space on your hard drive. Inspecting the root directory of the repository gives you an idea of what it provides:
It is important to note that the cmake/ directory and CMakeLists.txt file have different roles. Scripts contained in cmake/ enable external projects to locate necessary SFML artifacts on the filesystem - such as its shared libraries and header files. In order to read these files, an external project must be using CMake to generate its native build environment.
On the other hand, CMakeLists.txt is read by CMake to generate a native build environment for installing SFML on the system. We will take a look at what this entails next.
Building SFML
A common practice that takes place when building a project is to separate two directory hierarchies called the source tree and build tree. A source tree refers to a project’s directory tree that houses source code. On the other hand, a build tree houses native build files that are compiled into a project’s artifacts.
The root directory of the SFML repository is also the source tree root. This is because CMakeLists.txt references source files in nested sub-directories. It is therefore a good idea to create a new directory, also at the project root to contain our build tree. Let's call this directory build:
# Enter SFML repository
$ cd SFML/# Create and enter a build directory
$ mkdir build && cd build
We proceed by invoking the CMake program to read CMakeLists.txt in the parent directory:
$ cmake ..This command will generate native build files and a CMake cache containing an initial build configuration. The type of build files CMake will generate depends on what generator it has selected before CMakeLists.txt is read. On a UNIX based operating system such as Linux, CMake selects the Unix Makefiles generator by default. You can confirm which generator is selected by passing --help to the cmake program and inspecting a subsection called Generators at the bottom:
$ cmake --help | less
    -| Generators
       ...
       * Unix Makefiles = Generates standard UNIX makefiles.
Notice that the selected generator is marked with an asterisk symbol. A short description is also output to let us know the type of files it will produce. In our case, standard UNIX makefiles are generated which will allow us to invoke the make utility to generate SFML's artifacts such as its shared libraries, header files, and so on.
Let’s now turn our focus to the cache file that was generated by CMake after it read CMakeLists.txt. The cache is a file called CMakeCache.txt that is saved at the root of our build tree. We launch either the ccmake or cmake-gui programs to inspect and change particular configuration settings:
ccmake: A CLI that launches from within a terminal.cmake-gui: A GUI that provides a more traditional application experience.
I would personally recommend ccmake because it is fast, easy-to-use and launches directly within the terminal. With that said, let's open CMakeCache.txt and inspect its build options:
$ ccmake .Pressing t will toggle advance mode and display a complete list of available build options. In addition to ON and OFF switches, you will notice other options for setting things like search paths, installation paths, and compiler flags. Cycle through options by pressing the up and down arrow keys. The Enter key will also allow you to change a value tied to an option:
Settings within the cache dictate which SFML artifacts are generated at build time. For example, boolean options are set to either ON or OFF to control whether shared libraries, documentation, and example projects are generated. Paths to SFML dependencies are also saved in the cache. If a certain dependency cannot be found on the system, the corresponding field will contain a message to let you know. Important SFML related options to be aware of are listed here:
Let’s go ahead and turn on the following options to generate documentation files, example projects, and the test suit:
SFML_BUILD_DOC: ONSFML_BUILD_EXAMPLES: ONSFML_BUILD_TEST_SUIT: ON
Press c to update CMakeCache.txt followed by g to generate the corresponding build files. At this point our build tree contains doc/, lib/, examples/, test/ and src/ directories to house the corresponding items at build time.
From here we can build SFML according to our configuration:
$ makeIt may take a couple of minutes for the build process to complete. When it is finished, the SFML shared libraries and development header files will be stored in appropriate locations within our build tree.
The last step is to copy, or install, the generated components to appropriate places on the filesystem. Doing so will enable development projects to import the SFML libraries and header files automatically. Let’s invoke make install with administrative privileges to complete our installation:
$ sudo make installSFML components will be copied to install locations specified in the CMakeCache.txt file. If no installation paths were modified in the cache, SFML components will be installed to the following locations:
2. Creating a Boilerplate SFML Project
This section will walk through a boilerplate project that can be used as a starting point for games and multimedia applications built with SFML and CMake. It is included in this article’s companion repository within a directory called Boilerplate:
> Boilerplate/
    ---> CMakelists.txt
    ---> config.h.in
    ---> main.cpp
CMake is our tool of choice for compiling main.cpp into an executable and linking it to the SFML shared libraries. The program itself simply renders a blank window via the SFML graphics API, and can be closed by pressing the escape key. It also sends the project's version number to standard output. Let's go through each command in CMakeLists.txt and talk about how the SFML library components are imported into the project.
CMake Configuration File
As with most configurations, a minimum CMake version is specified at the top of the file followed by a project name and version number:
cmake_minimum_required(VERSION 3.12 FATAL_ERROR)
project(SFMLBoilerplate VERSION 0.1)
We then request to use features of the C++ 11 standard to build the project. The CMAKE_CXX_EXTENSIONS variable is also set to OFF to ensure the standard -std=c++11 flag is passed to the compiler. Feel free to replace 11 with a more recent C++ standard such as 14 or 17 if you would like to take advantage of newer language features:
set(CMAKE_CXX_STANDARD 11)
set(CMAKE_CXX_EXTENSIONS OFF)
set(CMAKE_CXX_STANDARD_REQUIRED TRUE)
A default build type is set in the next part of our configuration. The term "build type" in CMake refers to a certain build configuration such as debug and release. We give our configuration a debug build type by default. A debug build often results in fast compile times with debugging symbols baked into executables - enabling debugging with tools as such as GDB and LLDB:
if(NOT CMAKE_BUILD_TYPE)
  set(CMAKE_BUILD_TYPE Debug
    CACHE STRING "Choose the type of build (Debug or Release)" FORCE)
endif()
The next command generates a header file called config.h which includes preprocessor definitions that specify our project's major and minor version number. CMake reads config.h.in to produce this header file:
configure_file(config.h.in config.h)At this point we call find_package() to locate the SFML shared libraries and their corresponding header files. CMake is smart enough to detect the host operating system and deduce where standard locations are on its filesystem. With this in mind, all we need to do is pass the version of SFML along with the specific components (libraries) we wish to locate:
find_package(SFML 2.5
  COMPONENTS
    system window graphics network audio REQUIRED)
We opt to specify both a major and minor version (2.5) to ensure CMake locates the most recent version of SFML. It is also possible to not specify any version at all - in this case CMake will return the first version of SFML it finds on the system.
SFML contains six modules called Audio, Graphics, Network, System and Window, and are specified as components in the find_package() command. Components can be left out if you don't plan on linking to the corresponding library. For example, if you know a project will only ever require the system, window and graphics components, network and audio do not need to be specified.
Our configuration proceeds by instructing CMake to compile main.cpp into an executable file called SFMLBoilerplate via the add_executable() command. We call target_include_directories() immediately after to tell the build system where to find config.h:
add_executable(SFMLBoilerplate main.cpp)
target_include_directories(SFMLBoilerplate
  PRIVATE "${PROJECT_BINARY_DIR}")
We also link our SFMLBoilerplate target to the sfml-graphics shared library. Because our application creates an sf::Window object whose implementation is defined in SFML/Graphics.hpp, the graphics module must be loaded at runtime:
target_link_libraries(SFMLBoilerplate sfml-graphics)A single installation command wraps up our configuration. It specifies that the SFMLBoilerplate executable is copied to /usr/local/bin after invoking a sudo make install command:
install(TARGETS SFMLBoilerplate DESTINATION bin)Keep in mind that additional installation commands are necessary if an application loads resource files such as images, audio and fonts at runtime. We will take a look at how to handle this in a following section.
Building and Running the Boilerplate Project
We will use the same commands to build our boilerplate project as we did for building SFML. Let’s start by creating a build directory and invoking cmake to read CMakeLists.txt in the parent directory:
$ cd Boilerplate
$ mkdir build && cd build
$ cmake ..
Now is a good time to inspect the cache before committing to the build process. For example, you may want to select another build type or check which compiler flags are passed to the compiler:
$ ccmake .Finally, initiate a build with make and run the generated executable:
$ make
$ ./SFMLBoilerplate
If this is your first time building an SFML application with CMake, congratulations! An empty window is rendered and the project’s current version is sent to standard output. You can also press the escape key to exit the application:

3. Building and Installing a Pong Game
The boilerplate project is a nice foundation for developing multimedia applications completely from scratch. However, it still leaves some important questions unanswered such as:
- How do you load external resources into an application such as fonts, images and audio files?
- How can the source tree be amended to logically separate a project’s implementation and header files?
- How can a game be installed globally on a Linux system so any user can play it?
We will walk through the configuration of a pong game in order to answer these questions. The pong project is part of this article’s accompanying repository and is located in the top-level Pong/ directory. Subsequent sections will detail how to build pong locally as well as doing a system-wide installation.
Let’s firstly take a look at the source tree and its corresponding files that make up the project:
> Pong/
    ---> CMakeLists.txt
    ---> content/
           ---> background.png
           ---> bip.wav
           ---> sansation.ttf
    ---> include/
           ---> Ball.h
           ---> Bat.h
           ---> config.h.in
    ---> src/
           ---> Ball.cpp
           ---> Bat.cpp
           ---> main.cpp
Notice that src/ and include/ contain the application's source files:
Ball.h, Ball.cpp: Implements aBallclass that handles rendering and moving the pong ball around the window.Bat.h,Bat.cpp: Implements aBatclass that renders a rectangular platform which will moves left or right based on input from the keyboard.config.h.in: An input file we pass to CMake'sconfigure_file()command to generate aconfig.hheader file.main.cpp: Defines the applications entry point and handles user input, the game loop, and rendering.
It is not necessary to understand all of the code to complete this tutorial. You can get an idea of how the application works by carefully reading the comments in each source file and looking at how SFML objects are used throughout — all SFML classes are defined in a namespace called sf. I encourage you to check out the many books and tutorials online If you are interested in learning more about the SFML API.
Lastly, the content/ directory contains resources that our application loads at runtime. It includes a background image, sound effect and font for text rendering. The sansation.ttf font is provided by SFML and is usually included as part of the standard Xcode project template.
Resources such as images, fonts, audio, and configuration files should be put into the content/ directory. Not only does this keep our project organized, it also simplifies our installation script in CMakeLists.txt.
CMake Configuration File
One of the main challenges we must solve in our build configuration is how the executable is going to find resource files it loads at runtime. To understand this problem more clearly, consider the following points:
- When the executable is generated within the build tree, it will load resources locally from the project’s
Pong/content/directory. - When the executable is installed to a standard system location such as
/usr/local/bin/, it needs to load resources from another standard location such as/usr/local/share/Pong/content/to ensure the resources will always be available.
Looking at the problem another way, if we install an executable globally that looks for resources in an arbitrary project saved somewhere in a user’s home directory, there is no guarantee that those files, or even the project will exist at any given point in time. The executable will break if the user decides to delete, rename, or move the project to a different location. This problem becomes even more apparent if the executable is installed on another system altogether.
Our solution firstly involves defining an option in our build configuration called USE_INSTALL_RESOURCE_PATH along with a variable called RESOURCE_PATH such that:
- When
USE_INSTALL_RESOURCE_PATHis set toON,RESOURCE_PATHwill point to the resource installation location. - When
USE_INSTALL_RESOURCE_PATHis set toOFF,RESOURCE_PATHwill point to our local project’s resource directory.
Let’s see how this logic is expressed in CMakeLists.txt:
option(USE_INSTALL_RESOURCE_PATH
  "Set resource path to install location" OFF)if(NOT USE_INSTALL_RESOURCE_PATH)
  set(RESOURCE_PATH "${PROJECT_SOURCE_DIR}/content/")
else()
  set(RESOURCE_PATH
    "${CMAKE_INSTALL_PREFIX}/share/${CMAKE_PROJECT_NAME}/content/")
endif()
The path contained in RESOURCE_PATH is passed to our application through the config.h header file. The corresponding preprocessor definition is then referenced whenever a resource needs to be loaded at runtime. This happens in main.cpp:
std::string source_dir = RESOURCE_PATH; // ... Load font
sf::Font font;
if (!font.loadFromFile(source_dir + "sansation.TTF"))
return EXIT_FAILURE;// ... Load texture
sf::Texture texture;
if (!texture.loadFromFile(source_dir + "background.png"))
return EXIT_FAILURE;// ... Load sound buffer
sf::SoundBuffer buffer;
if (!buffer.loadFromFile(source_dir + "bip.wav"))
return EXIT_FAILURE;
Moving forward, we instruct CMake to find SFML version 2.5 somewhere on the system in addition to its libraries:
find_package(SFML 2.5
  COMPONENTS system window graphics audio REQUIRED)
Our configuration subsequently instructs CMake to compile the source files in src/ into an executable called Pong:
add_executable(Pong src/main.cpp src/Ball.cpp src/Bat.cpp)We also specify the build/ and include/ directories as include search paths by calling target_include_directories(). Built-in CMake variables are referenced here so our paths remain valid even if our project is moved to a different place on the filesystem:
target_include_directories(Pong
  PRIVATE
    "${PROJECT_BINARY_DIR}"
    "${CMAKE_CURRENT_SOURCE_DIR}/include")
We also set the INSTALL_RPATH_USE_LINK_PATH target property to TRUE for the Pong target near the bottom of our configuration. As a result, an installed executable is able to locate the SFML shared libraries and subsequently load them at runtime. Alternatively, the INSTALL_RPATH property can be set to a specific search path if the SFML libraries are installed in a non-standard location:
# Using INSTALL_RPATH_USE_LINK_PATH
set_target_properties(Pong
  PROPERTIES
    INSTALL_RPATH_USE_LINK_PATH TRUE)

# Using INSTALL_RPATH
set_target_properties(Pong
  PROPERTIES
    INSTALL_RPATH "${CMAKE_INSTALL_PREFIX}/lib")
Also keep in mind that the sfml-system and sfml-window libraries are linked implicitly if you explicitly link a target to the sfml-graphics library. We also pass sfml-audio to enable our game to play sound effects:
target_link_libraries(Pong sfml-graphics sfml-audio)Lastly, we make a couple of calls to the install() command for setting up correct install locations for the Pong executable and its resource files:
# Copy Pong to /usr/local/bin
install(TARGETS Pong DESTINATION bin)
# Copy content/ to /usr/local/share/Pong
install(DIRECTORY content
DESTINATION "${CMAKE_INSTALL_PREFIX}/share/${CMAKE_PROJECT_NAME}")Refer to this article’s repository to see the full listing of CMakeLists.txt with comments.
Building and Installing Pong
We have another chance to go through the build process with CMake! Let’s start by building a debug version of our pong game that can be run directly in the build tree:
$ cd Pong
$ mkdir build && cd build
$ cmake ..
$ cmake --build .
Remember that our USE_INSTALL_RESOURCE_PATH option is set to OFF by default. As a result, the generated Pong executable will point to the content/ directory within our local project to resources. For debugging and testing purposes, this is absolutely fine. Go ahead and run Pong to try out the game before we commit to an install:
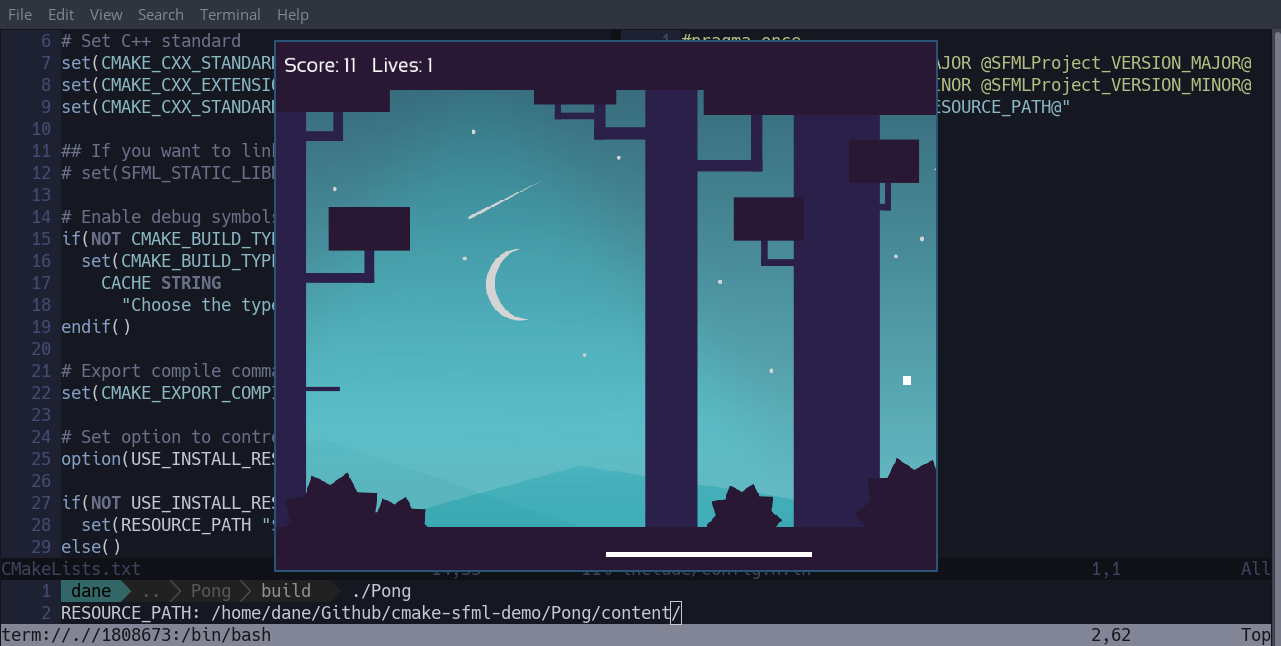
Pong is working pretty well — we can now proceed to build a release version and install it to the system. Let’s firstly remove our debug version by cleaning the build tree. This is necessary as we don’t want to install an executable that attempts to load resources from an arbitrary place on the filesystem by mistake:
$ cmake --build . --target cleanFrom here, open the cache with ccmake and modify the following settings:
CMAKE_BUILD_TYPE:Release
A release build type will optimize our application's internal assembly code for improved performance and strip out any debugging symbols.USE_INSTALL_RESOURCE_PATH:ON
Ensure that the executable points to a standard system location to load its resources.
Press c to update CMakeCache.txt followed by g to generate corresponding native build files. Then build the project from the command line:
$ make
Finally, let’s install our application and its resources:
$ sudo make install
  [100%] Built target Pong
  Install the project...
  -- Install configuration: "Release"
  -- Installing: /usr/local/bin/Pong
  -- Set runtime path of "/usr/local/bin/Pong" to "/usr/local/lib"
  -- Installing: /usr/local/share/Pong/content
  -- Installing: /usr/local/share/Pong/content/bip.wav
  -- Installing: /usr/local/share/Pong/content/background.png
  -- Installing: /usr/local/share/Pong/content/sansation.ttf
Pong can now be launched just like a regular Linux application. For example, one method to launch it is to simply run Pong in a terminal.
In Conclusion
In addition to building the SFML libraries from source, this article has detailed how to build and install SFML-based applications without using a traditional IDE. Instead, we used the CMake DSL (domain-specific language) to write build and install scripts for our projects. These scripts can be further developed to support other operating systems and take advantage of other CMake tools such as CPack and CTest.
Related Articles
Other articles I have written that focus on developing with CMake: